Let’s see how to create a war file using maven.
We will create a war file for a spring boot project using eclipse and cmd. First, we will see with the eclipse then with cmd or git bash.
Make sure you have installed maven in your local machine and path has been set. For example, I have downloaded maven in my local machine and set the path as below.
Let’s create a war file using maven.
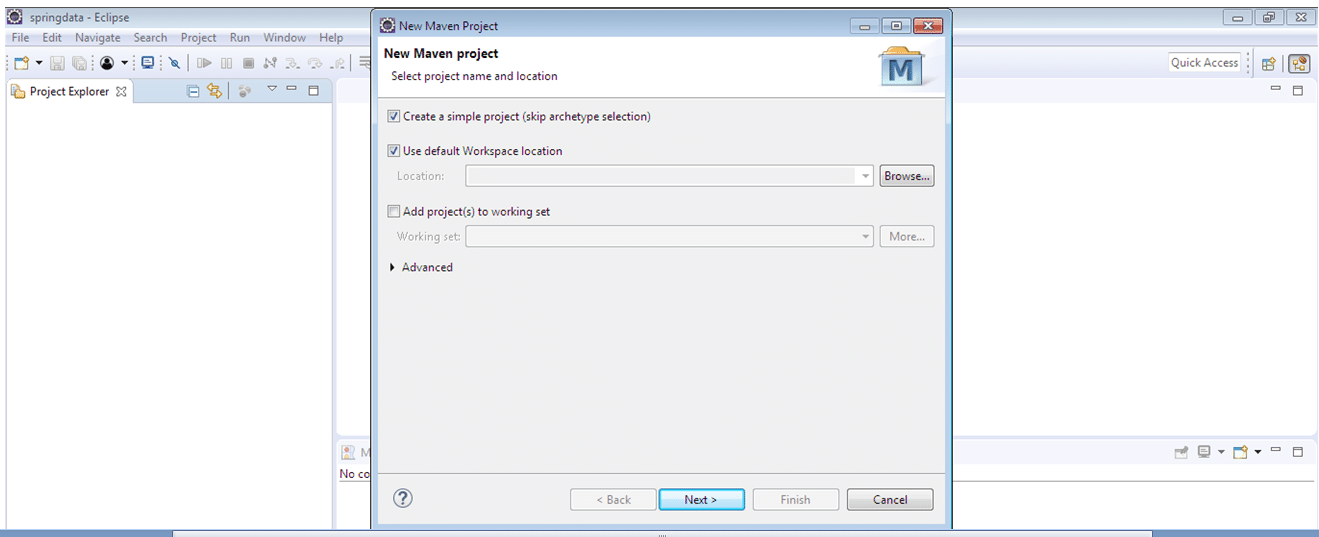
Step 1 – open eclipse and create maven project, Don’t forget to check ‘Create a simple project (skip)click on next.

Step 2 – Fill all details as below and click on finish.
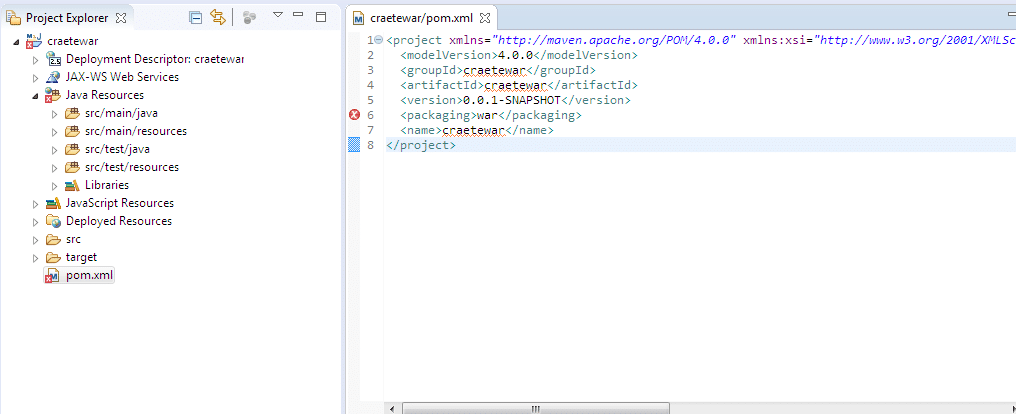
Step 3 – Below directory structure will be created.
Step 4 – Modify the pom.xml as below.
pom.xml
<project xmlns="http://maven.apache.org/POM/4.0.0" xmlns:xsi="http://www.w3.org/2001/XMLSchema-instance" xsi:schemaLocation="http://maven.apache.org/POM/4.0.0 http://maven.apache.org/xsd/maven-4.0.0.xsd">
  <modelVersion>4.0.0</modelVersion>
  <groupId>craetewar</groupId>
  <artifactId>craetewar</artifactId>
  <version>0.0.1-SNAPSHOT</version>
  <packaging>war</packaging>
  <name>craetewar</name>

   <parent>
        <groupId>org.springframework.boot</groupId>
        <artifactId>spring-boot-starter-parent</artifactId>
        <version>1.5.2.RELEASE</version>
    </parent>
   <dependencies>
		<dependency>
			<groupId>org.springframework.boot</groupId>
			<artifactId>spring-boot-starter-web</artifactId>
		</dependency>
    </dependencies>


  <build>
   <plugins>
       <plugin>
            <artifactId>maven-compiler-plugin</artifactId>
            <version>3.1</version>
        </plugin>
    </plugins>
   </build>

</project>
We have pom.xml, having very less dependency. Here we are just creating a war file. Now we have defined dependency in pom.xml as soon as we build the project using mvn clean install the command, it will start to download corresponding libraries or jar files from the web. Make sure you have an internet connection if you are using maven first time. These jars will get downloaded from the maven repository.
Note – For example, In my case, It downloaded all dependencies(libraries or jars) in the below folder.
C:\Users\username\.m2\repository
Step 5 – Define Spring main class(Although it’s not needed, just add a dummy class, at least we will have something in our war file).
SpringMain.java
package com.createwar;


import org.springframework.boot.SpringApplication;
import org.springframework.boot.autoconfigure.SpringBootApplication;
import org.springframework.context.ConfigurableApplicationContext;

@SpringBootApplication
public class SpringMain {
	public static void main(final String[] args) {
		final ConfigurableApplicationContext configurableApplicationContext = SpringApplication
				.run(SpringMain.class, args);


	}


}
We are good now to create a war file. We need to build us the application.
Way to build and generate war file –
- Using Eclipse
- Using cmd
Create a war file using Maven in Eclipse –
Right-click on application/Run As/maven install
Might be you will not get any error. Unfortunately, I got below error while building the application.
So what is happening here, we need to configure JDK instead of JRE.
How to fix this error –
Right click on application/properties/java build path/libraries/click on JRE System Library/edit/Alternate JRE/installed JRE/edit/change the JRE definition – point JDK instead of JRE
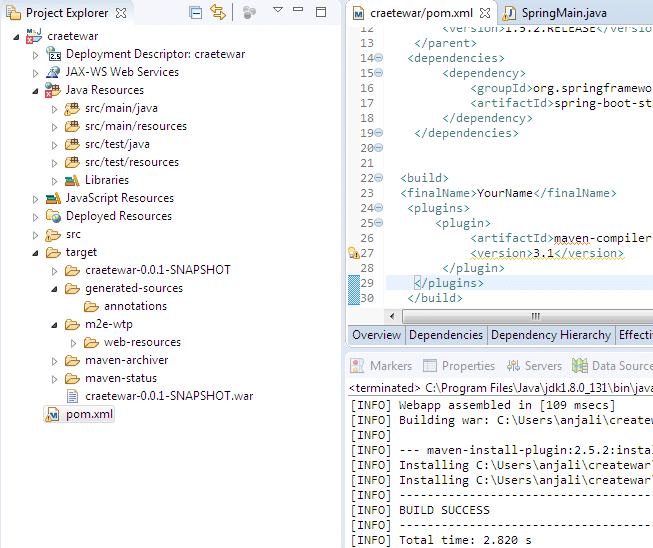
Again run as maven install. The build will be successful and have war file in the target folder.
If you notice we have war file with a name craetewar-0.0.1-SNAPSHOT.war. We can change it.
Changing the war file name –
Add <finalName>createwarexample</finalName> tag in build section in pom.xml.
That’s all how to create war file using maven and eclipse. Let’s see how to create a war file using a command prompt(i.e cmd). For beginners, it is important to understand when you work in real-time we prefer to create war using cmd or git bash. if you are familiar with git then ok else no need to worry. Here we are going to use cmd.
Create a war file using cmd-
Step 1 – First we need to modify pom.xml. We need to add compiler where we have installed java.
pom.xml
<project xmlns="http://maven.apache.org/POM/4.0.0" xmlns:xsi="http://www.w3.org/2001/XMLSchema-instance" xsi:schemaLocation="http://maven.apache.org/POM/4.0.0 http://maven.apache.org/xsd/maven-4.0.0.xsd">
  <modelVersion>4.0.0</modelVersion>
  <groupId>craetewar</groupId>
  <artifactId>craetewar</artifactId>
  <version>0.0.1-SNAPSHOT</version>
  <packaging>war</packaging>
  <name>craetewar</name>

   <parent>
        <groupId>org.springframework.boot</groupId>
        <artifactId>spring-boot-starter-parent</artifactId>
        <version>1.5.2.RELEASE</version>
    </parent>
   <dependencies>
		<dependency>
			<groupId>org.springframework.boot</groupId>
			<artifactId>spring-boot-starter-web</artifactId>
		</dependency>
    </dependencies>


  <build>
  <finalName>createwarexample</finalName>
   <plugins>
       <plugin>
            <artifactId>maven-compiler-plugin</artifactId>
            <version>3.1</version>
			<configuration>
			<fork>true</fork>
			<executable>C:\Program Files\Java\jdk1.8.0_131\bin\javac.exe</executable>
			</configuration>
        </plugin>
    </plugins>
   </build>

</project>
Step 2 – Go to the directory where we have our code and type cmd in the address bar. For example, our code is in below directory.
Step 2 – We will type cmd in the address bar and hit enter. It will open the console as below.
Step 3 – Run mvn clean install command which will craete war file.
Now we should have a war file in the target folder.
In case if you face any compiler related issue visit this post.
Now we have a war file. We can deploy this war to JBoss or Tomcat server. We have a separate tutorial which explains how to deploy the war file in JBoss and Tomcat.
That’s all about How to create a war file using maven.


