
In this post we will see Spring Boot Kafka Producer and Consumer Example from scratch. We are going to cover below points.
How to install Apache Kafka.
How to start zookeeper/kafka and create a topic.
How to configure spring and apache Kafka.
How to create Kafka producer and consumer to send/receive string messages – Hello word example.
How to create Kafka producer and consumer to send/receive JSON messages.
How to create a Kafka Consumer Rest controller/end-point.
Testing using postman.
Installing Apche kafka and Creating Topic.
In this section, we will see how to install kafka(run zookeeper and kafka server) and create topic.
Insatlling Apache Kafka in windows.
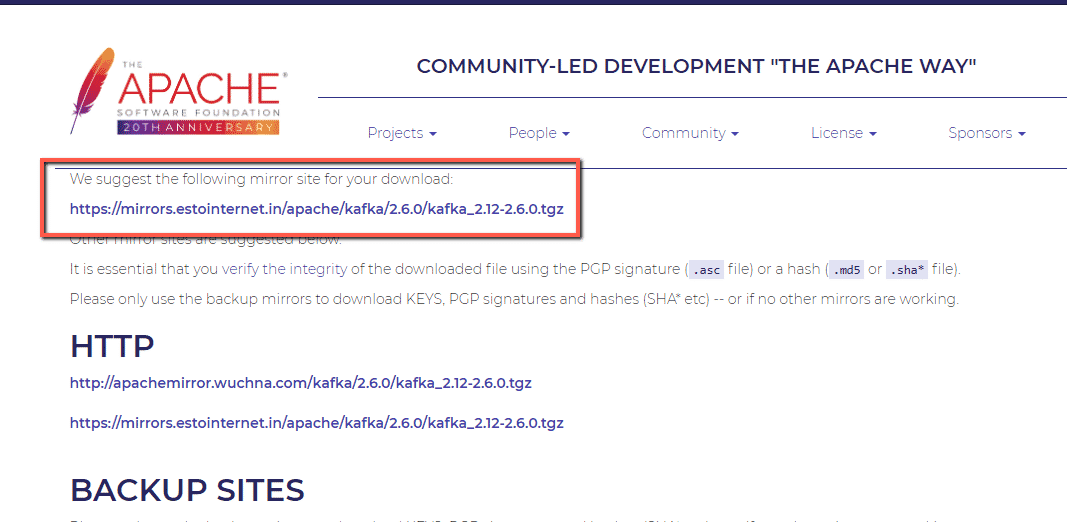
Download kafka using below link.
https://kafka.apache.org/downloads
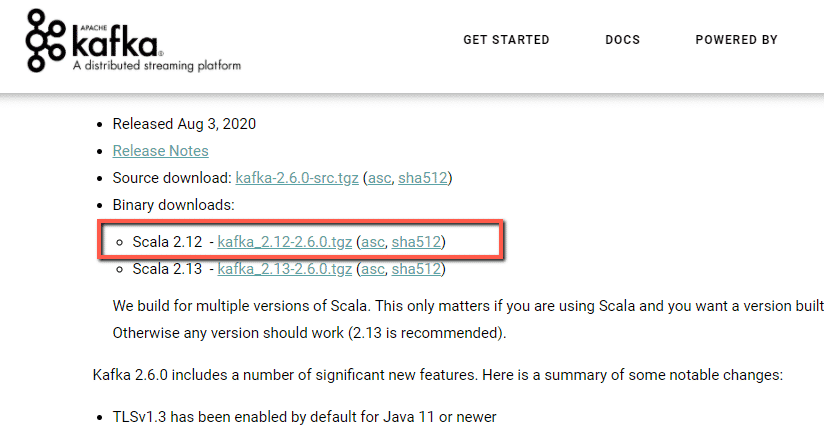
Download from below link.
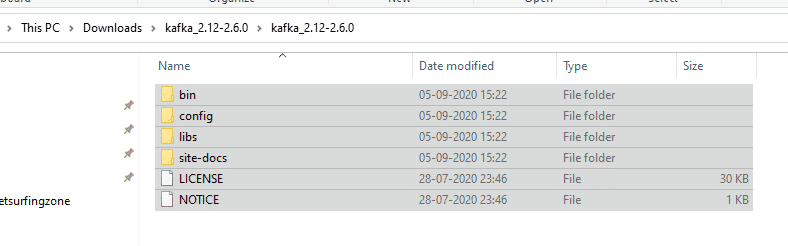
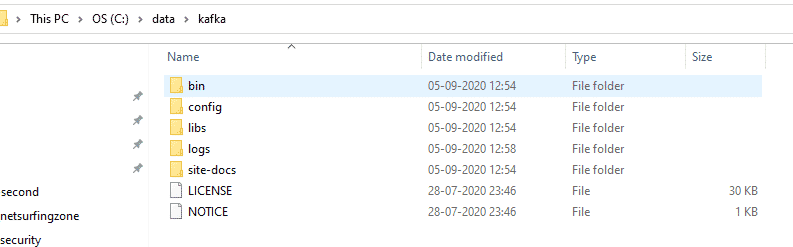
Note(for beginners) – Create directory C:\data\kafka and keep all folder inside the Kafka folder from the download directory, to avoid error while running Kafka related command(for example you may get input command is a too long error).
For example i have downloaded and extracted apache kafka as below.
Copied all content and paste to C:\data\kafka
Running zookeeper and kafka.
Use below command to run zookeeper.
C:\data\kafka>.\bin\windows\zookeeper-server-start.bat .\config\zookeeper.properties

Use below command to run kafka.
C:\data\kafka>.\bin\windows\kafka-server-start.bat .\config\server.properties

Creating topic.
C:\data\kafka>.\bin\windows\kafka-topics.bat –create –zookeeper localhost:2181 –replication-factor 1 –partitions 1 –topic javatute-topic-1

We have created topic javatute-topic-1 that we are going to use later in this example.
Spring Boot Apache Kafka example – Producing and consuming string type message
Open eclipse and create a maven project, Don’t forget to check to ‘create a simple project (skip)’ click on next. Fill all details(GroupId – spring-boot-kafka-hello-world-example , ArtifactId – spring-boot-kafka-hello-world-example , and name – spring-boot-kafka-hello-world-example) and click on finish. Keep packaging as the jar.
maven dependency
<project xmlns="http://maven.apache.org/POM/4.0.0" xmlns:xsi="http://www.w3.org/2001/XMLSchema-instance"
	xsi:schemaLocation="http://maven.apache.org/POM/4.0.0 http://maven.apache.org/xsd/maven-4.0.0.xsd">
	<modelVersion>4.0.0</modelVersion>
	<groupId>spring-boot-kafka-hello-world-example</groupId>
	<artifactId>spring-boot-kafka-hello-world-example</artifactId>
	<version>0.0.1-SNAPSHOT</version>
	<name>spring-boot-kafka-hello-world-example</name>
	<description>spring-boot-kafka-hello-world-example</description>

	<parent>
		<groupId>org.springframework.boot</groupId>
		<artifactId>spring-boot-starter-parent</artifactId>
		<version>2.0.2.RELEASE</version>
	</parent>
	<dependencies>
		<dependency>
			<groupId>org.springframework.boot</groupId>
			<artifactId>spring-boot-starter-web</artifactId>
		</dependency>

		<!-- https://mvnrepository.com/artifact/org.springframework.kafka/spring-kafka -->
		<dependency>
			<groupId>org.springframework.kafka</groupId>
			<artifactId>spring-kafka</artifactId>
		</dependency>

	</dependencies>
</project>
Directory structure of spring-boot-kafka-hello-world-example.

Create ApplicationConstant.java class.
package com.javatute.constant;

public class ApplicationConstant {
	public static final String KAFKA_LOCAL_SERVER_CONFIG = "localhost:9092";
	public static final String GROUP_ID_STRING = "group-id-string-1";
	public static final String TOPIC_NAME = "javatute-topic-1";
	public static final String KAFKA_LISTENER_CONTAINER_FACTORY = "kafkaListenerContainerFactory";
}
Create configuration class SpringKafkaConfig.java.
package com.javatute.config;

import java.util.HashMap;
import java.util.Map;

import org.apache.kafka.clients.consumer.ConsumerConfig;
import org.apache.kafka.common.serialization.StringDeserializer;
import org.springframework.context.annotation.Bean;
import org.springframework.context.annotation.Configuration;
import org.springframework.kafka.annotation.EnableKafka;
import org.springframework.kafka.config.ConcurrentKafkaListenerContainerFactory;
import org.springframework.kafka.core.ConsumerFactory;
import org.springframework.kafka.core.DefaultKafkaConsumerFactory;

import com.javatute.constant.ApplicationConstant;

@Configuration
@EnableKafka
public class SpringKafkaConfig {
	@Bean
	public ConsumerFactory<String, String> consumerFactory() {
		Map<String, Object> configMap = new HashMap<>();
		configMap.put(ConsumerConfig.BOOTSTRAP_SERVERS_CONFIG, ApplicationConstant.KAFKA_LOCAL_SERVER_CONFIG);//line-23
		configMap.put(ConsumerConfig.KEY_DESERIALIZER_CLASS_CONFIG, StringDeserializer.class);//line-24
		configMap.put(ConsumerConfig.VALUE_DESERIALIZER_CLASS_CONFIG, StringDeserializer.class);//line-25
		configMap.put(ConsumerConfig.GROUP_ID_CONFIG, ApplicationConstant.GROUP_ID_STRING);//line-26
		return new DefaultKafkaConsumerFactory<>(configMap);
	}

	@Bean
	public ConcurrentKafkaListenerContainerFactory<String, String> kafkaListenerContainerFactory() {
		ConcurrentKafkaListenerContainerFactory<String, String> factory = new ConcurrentKafkaListenerContainerFactory<String, String>();
		factory.setConsumerFactory(consumerFactory());
		return factory;
	}
}
At line 23 we are providing apache kafka local server details. The line number 24 and 25, we are configuring what type of data(key and value) we are are going to deserialize.
Create Message Producer class i.e KafkaProducer – This class will used to send the message.
package com.javatute.producer;
import org.springframework.beans.factory.annotation.Autowired;
import org.springframework.kafka.core.KafkaTemplate;
import org.springframework.web.bind.annotation.GetMapping;
import org.springframework.web.bind.annotation.PathVariable;
import org.springframework.web.bind.annotation.RequestMapping;
import org.springframework.web.bind.annotation.RestController;
import com.javatute.constant.ApplicationConstant;
@RestController
@RequestMapping("/produce")
public class KafkaProducer {
@Autowired
private KafkaTemplate<String, Object> kafkaTemplate;
@GetMapping("/{message}")
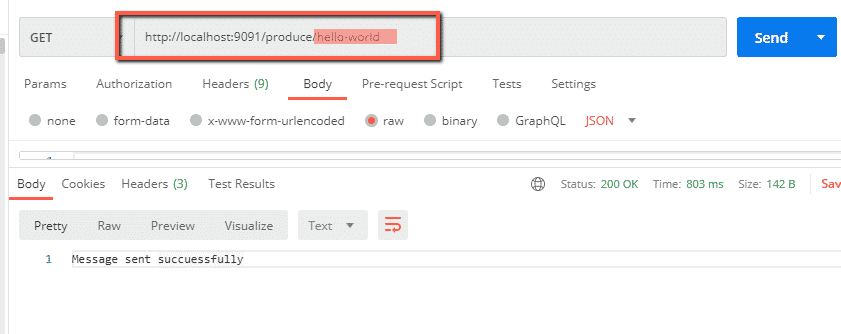
public String sendMessage(@PathVariable String message) {
try {
kafkaTemplate.send(ApplicationConstant.TOPIC_NAME, message);
} catch (Exception e) {
e.printStackTrace();
}
return "Message sent succuessfully";
}
}
The KafkaTemplate class is available in org.springframework.kafka.core package and implements the KafkaOperations interface. The KafkaOperations interface contains the different overloaded versions of the send() method. See docs for more details.
Create message consumer listener class i.e KafkaConsumer.java – This class is used to receive the message from topic.
package com.javatute.consumer;
import org.slf4j.Logger;
import org.slf4j.LoggerFactory;
import org.springframework.kafka.annotation.KafkaListener;
import org.springframework.stereotype.Component;
import com.javatute.constant.ApplicationConstant;
@Component
public class KafkaConsumer {
private static final Logger logger = LoggerFactory.getLogger(KafkaConsumer.class);
@KafkaListener(groupId = ApplicationConstant.GROUP_ID_STRING, topics = ApplicationConstant.TOPIC_NAME,
containerFactory = ApplicationConstant.KAFKA_LISTENER_CONTAINER_FACTORY)
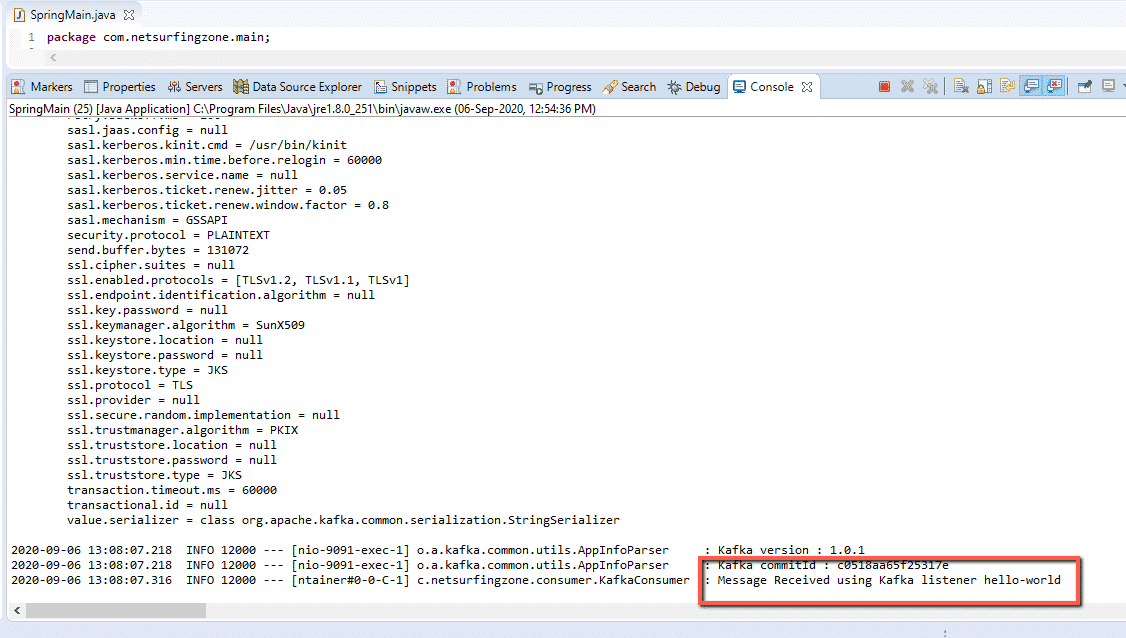
public void receivedMessage(String message) {
logger.info("Message Received using Kafka listener " + message);
}
}
Define SpringMain.java class
package com.javatute.main;

import org.springframework.boot.SpringApplication;
import org.springframework.boot.autoconfigure.SpringBootApplication;
import org.springframework.context.annotation.ComponentScan;

@SpringBootApplication
@ComponentScan(basePackages = "com.javatute.*")
public class SpringMain {
	public static void main(String[] args) {
		SpringApplication.run(SpringMain.class, args);
	}

}
application.yml
server:
   port: 9091
Run the SpringMain class and deploy the application.

Open postman or any browser and send any message in url.
observe the console, our consumer should able to receive message.
Note – We can see message that we send using postman using cmd.
Open cmd, go to till below directory and run below command.
C:\data\kafka>.\bin\windows\kafka-console-consumer.bat –bootstrap-server localhost:9092 –topic javatute-topic-1
Send message from postman. We should able to see

Now we will see how to produce and consume json type message using apache kafka and Spring Boot.
Spring Boot Apache Kafka example – Producing and consuming JSON type message
Open eclipse and create a maven project, Don’t forget to check to ‘create a simple project (skip)’ click on next. Fill all details(GroupId – spring-boot-kafka-json-message-example , ArtifactId – spring-boot-kafka-json-message-example , and name – spring-boot-kafka-json-message-example) and click on finish. Keep packaging as the jar.
maven dependency would be same as previous example.
Directory structure of spring-boot-kafka-json-message-example.

In ApplicationConstant.java class define new constant.
public static final String GROUP_ID_JSON = “group-id-json-1”;
Create new class Student.java.
package com.javatute.dto;

public class Student {
	private Long id;
	private String name;
	private String rollNumber;

        //getter & setter
}
We need to modify SpringKafkaConfig.java as below.
package com.javatute.config;

import java.util.HashMap;
import java.util.Map;

import org.apache.kafka.clients.consumer.ConsumerConfig;
import org.apache.kafka.clients.producer.ProducerConfig;
import org.apache.kafka.common.serialization.StringDeserializer;
import org.apache.kafka.common.serialization.StringSerializer;
import org.springframework.context.annotation.Bean;
import org.springframework.context.annotation.Configuration;
import org.springframework.kafka.annotation.EnableKafka;
import org.springframework.kafka.config.ConcurrentKafkaListenerContainerFactory;
import org.springframework.kafka.core.ConsumerFactory;
import org.springframework.kafka.core.DefaultKafkaConsumerFactory;
import org.springframework.kafka.core.DefaultKafkaProducerFactory;
import org.springframework.kafka.core.KafkaTemplate;
import org.springframework.kafka.core.ProducerFactory;
import org.springframework.kafka.support.serializer.JsonDeserializer;
import org.springframework.kafka.support.serializer.JsonSerializer;

import com.javatute.constant.ApplicationConstant;
import com.javatute.dto.Student;

@Configuration
@EnableKafka
public class SpringKafkaConfig {

	@Bean
	public ProducerFactory<String, Object> producerFactory() {
		Map<String, Object> configMap = new HashMap<>();
		configMap.put(ProducerConfig.BOOTSTRAP_SERVERS_CONFIG, ApplicationConstant.KAFKA_LOCAL_SERVER_CONFIG);
		configMap.put(ProducerConfig.KEY_SERIALIZER_CLASS_CONFIG, StringSerializer.class);
		configMap.put(ProducerConfig.VALUE_SERIALIZER_CLASS_CONFIG, JsonSerializer.class);
		return new DefaultKafkaProducerFactory<String, Object>(configMap);
	}

	@Bean
	public KafkaTemplate<String, Object> kafkaTemplate() {
		return new KafkaTemplate<>(producerFactory());
	}

	@Bean
	public ConsumerFactory<String, Student> consumerFactory() {
		Map<String, Object> configMap = new HashMap<>();
		configMap.put(ConsumerConfig.BOOTSTRAP_SERVERS_CONFIG, ApplicationConstant.KAFKA_LOCAL_SERVER_CONFIG);
		configMap.put(ConsumerConfig.KEY_DESERIALIZER_CLASS_CONFIG, StringDeserializer.class);
		configMap.put(ConsumerConfig.VALUE_DESERIALIZER_CLASS_CONFIG, JsonDeserializer.class);
		configMap.put(ConsumerConfig.GROUP_ID_CONFIG, ApplicationConstant.GROUP_ID_JSON);
		configMap.put(JsonDeserializer.TRUSTED_PACKAGES, "com.javatute.dto");
//line-50
		return new DefaultKafkaConsumerFactory<>(configMap);
	}

	@Bean
	public ConcurrentKafkaListenerContainerFactory<String, Student> kafkaListenerContainerFactory() {
		ConcurrentKafkaListenerContainerFactory<String, Student> factory = new ConcurrentKafkaListenerContainerFactory<String, Student>();
		factory.setConsumerFactory(consumerFactory());
		return factory;
	}
}
We are doing configMap.put(JsonDeserializer.TRUSTED_PACKAGES, "com.javatute.dto"); at line number 50 to avoid below error.
org.apache.kafka.common.errors.SerializationException: Error deserializing key/value for partition javatute-topic-1-0 at offset 26. If needed, please seek past the record to continue consumption.
Caused by: java.lang.IllegalArgumentException: The class ‘com.javatute.dto.Student’ is not in the trusted packages: [java.util, java.lang]. If you believe this class is safe to deserialize, please provide its name. If the serialization is only done by a trusted source, you can also enable trust all (*).
We can define these configuration in application.properties files too. See more details about how to configure kafka trusted package here(docs).
Modify KafkaProducer.java – This class will used to send the json message.
package com.javatute.producer;

import org.springframework.beans.factory.annotation.Autowired;
import org.springframework.kafka.core.KafkaTemplate;
import org.springframework.web.bind.annotation.PostMapping;
import org.springframework.web.bind.annotation.RequestBody;
import org.springframework.web.bind.annotation.RequestMapping;
import org.springframework.web.bind.annotation.RestController;

import com.javatute.constant.ApplicationConstant;
import com.javatute.dto.Student;

@RestController
@RequestMapping("/produce")
public class KafkaProducer {

	@Autowired
	private KafkaTemplate<String, Object> kafkaTemplate;

	@PostMapping("/message")
	public String sendMessage(@RequestBody Student message) {

		try {
			kafkaTemplate.send(ApplicationConstant.TOPIC_NAME, message);
		} catch (Exception e) {
			e.printStackTrace();
		}
		return "json message sent succuessfully";
	}

}
Modify KafkaConsumer.java – This class is used to receive the json message from topic.
package com.javatute.consumer;

import org.slf4j.Logger;
import org.slf4j.LoggerFactory;
import org.springframework.kafka.annotation.KafkaListener;
import org.springframework.stereotype.Component;

import com.fasterxml.jackson.core.JsonProcessingException;
import com.fasterxml.jackson.databind.ObjectMapper;
import com.javatute.constant.ApplicationConstant;
import com.javatute.dto.Student;

@Component
public class KafkaConsumer {

	private static final Logger logger = LoggerFactory.getLogger(KafkaConsumer.class);

	@KafkaListener(groupId = ApplicationConstant.GROUP_ID_JSON, topics = ApplicationConstant.TOPIC_NAME, containerFactory = ApplicationConstant.KAFKA_LISTENER_CONTAINER_FACTORY)
	public void receivedMessage(Student message) throws JsonProcessingException {
		ObjectMapper mapper = new ObjectMapper();
		String jsonString = mapper.writeValueAsString(message);
		logger.info("Json message received using Kafka listener " + jsonString);
	}
}
SpringMain.java would remain same.


Observe the console.
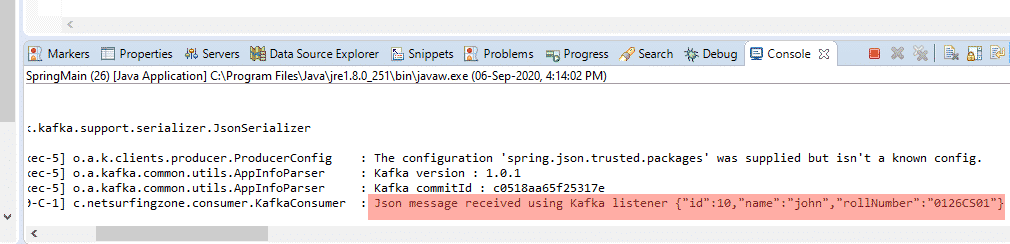
Yes! We are able to read json message using Apache kafka listener.
Creating Kafka consumer REST API – Define Rest end-point to consume message from Kafka topic.
We covered how to define Kafka consumers using @KafkaListener annotation to read messages from the Kafka topic. In this section how to create a Rest end-point to consume messages. We are not going to use Kafka listeners, instead of that, we will create the rest end-point.
Modify the KafkaConsumer.java class as below.
package com.javatute.consumer;
import java.util.ArrayList;
import java.util.Arrays;
import java.util.Iterator;
import java.util.List;
import org.apache.kafka.clients.consumer.Consumer;
import org.apache.kafka.clients.consumer.ConsumerRecord;
import org.apache.kafka.clients.consumer.ConsumerRecords;
import org.springframework.beans.factory.annotation.Autowired;
import org.springframework.kafka.config.ConcurrentKafkaListenerContainerFactory;
import org.springframework.kafka.core.ConsumerFactory;
import org.springframework.web.bind.annotation.GetMapping;
import org.springframework.web.bind.annotation.RequestMapping;
import org.springframework.web.bind.annotation.RestController;
import com.javatute.constant.ApplicationConstant;
import com.javatute.dto.Student;
@RestController
@RequestMapping("/consume")
public class KafkaConsumer {
@Autowired
private ConcurrentKafkaListenerContainerFactory<String, Student> factory;
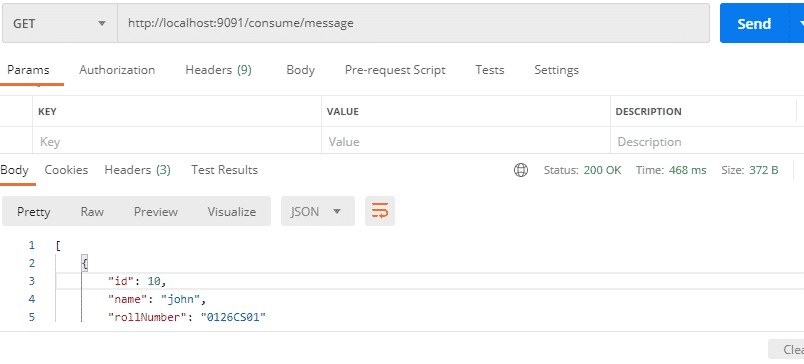
@GetMapping("/message")
public List<Student> receiveMessage() {
List<Student> students = new ArrayList<>();
ConsumerFactory<String, Student> consumerFactory = factory.getConsumerFactory();
Consumer<String, Student> consumer = consumerFactory.createConsumer();
try {
consumer.subscribe(Arrays.asList(ApplicationConstant.TOPIC_NAME));
ConsumerRecords<String, Student> consumerRecords = consumer.poll(10000);
Iterable<ConsumerRecord<String, Student>> records = consumerRecords.records(ApplicationConstant.TOPIC_NAME);
Iterator<ConsumerRecord<String, Student>> iterator = records.iterator();
while (iterator.hasNext()) {
students.add(iterator.next().value());
}
} catch (Exception e) {
e.printStackTrace();
}
return students;
}
}
Rest of code would be same(configuration and other class).
Let’s try to consume messages from kafka topic.
http://localhost:9091/consume/message
We should able to see message in response.
[
    {
        "id": 10,
        "name": "john",
        "rollNumber": "0126CS01"
    }
]
That’s all about Spring Boot Kafka Producer and Consumer Example.
Downlod complete example from github.
Other messaging tutorial from scratch.
Spring Data JPA Examples.
- Spring Boot CRUD Example With MySQL/PostgreSQL.
- Hazelcast Cache Spring Boot Example.
- How to get ApplicationContext in Spring Boot.
- How to get JPA EntityManager in Spring Boot.
- Spring Data JPA Interview Questions and Answers.
- Spring Data JPA StartingWith And EndingWith Example.
Spring kafka docs.
Summary – We have seen Spring Boot Kafka Producer and Consumer Example from scratch. we need to run both zookeeper and kafka in order to send message using kafka.
