
In this article, we will see how to deploy multiple war files in Jboss in the same port. First, we will create two separate projects with the name module1 and module2. Both modules will contain a separate war file. There is no dependency on both modules. Once we will have two wars we will deploy into JBoss. We are going to use JBoss 7 (jboss-eap-7.1.0) for this tutorial. The way to do this is simple. We need to put both the war file in the deployment folder and run the standalone.bat file.

First, we will create a war file using maven with name module1.war and module1.war then we will deploy this war file to JBoss server. For changing the name of war file we need to add <finalName>${project.artifactId}</finalName> in pom.xml(we will see later). Let’s start.
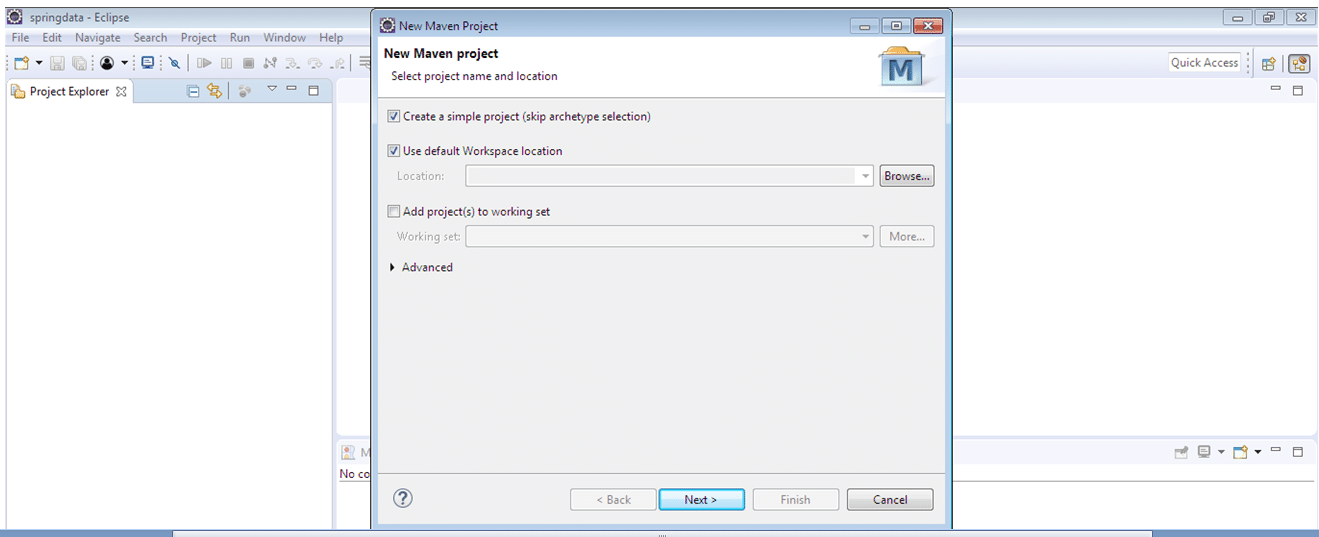
Step 1. Step 1 – Open eclipse and create maven project, Don’t forget to check ‘Create a simple project (skip)click on next.
Step 2 – Fill all details as below and click on finish.
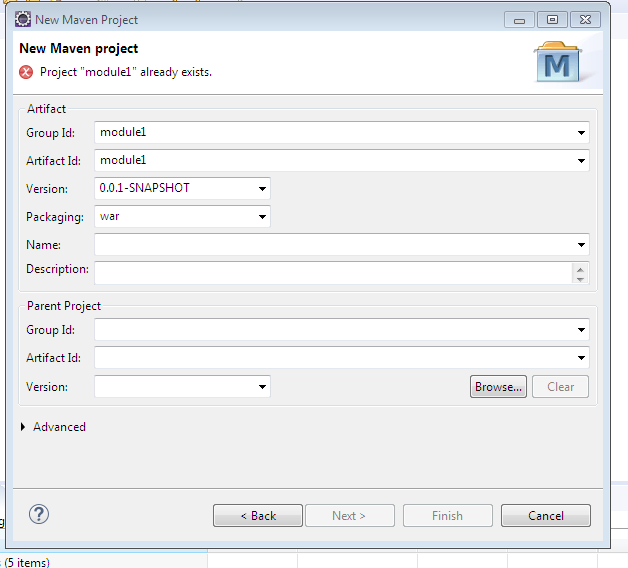
It is showing module1 already exist because I have already, this will not show in your case.
Step 3 – After clicking on the finish we have directory structure something like below.
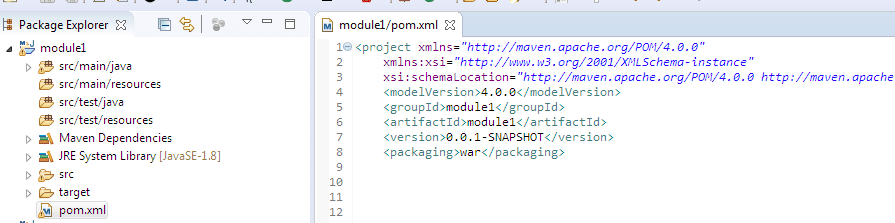
Step 4 – Modify the pom.xml.
<project xmlns="http://maven.apache.org/POM/4.0.0"
	xmlns:xsi="http://www.w3.org/2001/XMLSchema-instance"
	xsi:schemaLocation="http://maven.apache.org/POM/4.0.0 http://maven.apache.org/xsd/maven-4.0.0.xsd">
	<modelVersion>4.0.0</modelVersion>
	<groupId>module1</groupId>
	<artifactId>module1</artifactId>
	<version>0.0.1-SNAPSHOT</version>
	<packaging>war</packaging>

	<parent>
		<groupId>org.springframework.boot</groupId>
		<artifactId>spring-boot-starter-parent</artifactId>
		<version>2.0.2.RELEASE</version>
		<relativePath />
	</parent>


	<dependencies>
		<dependency>
			<groupId>org.springframework.boot</groupId>
			<artifactId>spring-boot-starter-web</artifactId>
			<exclusions>
				<exclusion>
					<groupId>org.springframework.boot</groupId>
					<artifactId>spring-boot-starter-tomcat</artifactId>
				</exclusion>
			</exclusions>
		</dependency>


		<dependency>
			<groupId>javax.servlet</groupId>
			<artifactId>javax.servlet-api</artifactId>
			<scope>provided</scope>
		</dependency>
	</dependencies>
	<build>
		<finalName>${project.artifactId}</finalName>
		<plugins>

			<plugin>
				<artifactId>maven-compiler-plugin</artifactId>
				<version>3.1</version>
				<configuration>
					<fork>true</fork>
					<executable>C:\Program Files\Java\jdk1.8.0_131\bin\javac.exe</executable>
				</configuration>
			</plugin>


		</plugins>
	</build>

</project>
Modify this one where you have installed JDK
configuration>
                <fork>true</fork>
                <executable>C:\Program Files\Java\jdk1.8.0_131\bin\javac.exe</executable>
 </configuration>
When we modify pom.xml and save it, Maven will download all jar needed.
Step 5 – Create package module1 and define all files controller class(BookController.java), Book.java and SpringMainModule1.java in this package. We will keep this application simple. Our main purpose is to build(create war) and deploy the application on JBOSS.
Our directory structure looks as below.

Initially, we will have nothing in our target folder since I have had already given the build, I have module1.war in the target folder.
Let’s define three class.
Book.java
package module1;

public class Book {
	int bookId;
	String bookName;
	String bookPrice;
	public int getBookId() {
		return bookId;
	}
	public void setBookId(int bookId) {
		this.bookId = bookId;
	}
	public String getBookName() {
		return bookName;
	}
	public void setBookName(String bookName) {
		this.bookName = bookName;
	}
	public String getBookPrice() {
		return bookPrice;
	}
	public void setBookPrice(String bookPrice) {
		this.bookPrice = bookPrice;
	}
}
BookController.java
package module1;

import org.springframework.stereotype.Controller;
import org.springframework.web.bind.annotation.RequestMapping;
import org.springframework.web.bind.annotation.RequestMethod;
import org.springframework.web.bind.annotation.ResponseBody;
import org.springframework.web.bind.annotation.RestController;


@RestController
public class BookController {

	@RequestMapping(value = "/book1",method = RequestMethod.GET)
	@ResponseBody
    public Book getBook() {
    	Book book = new Book();
    	book.setBookId(112);
    	book.setBookName("i am book one");
    	book.setBookPrice("120");
    	return book;
	}

}
SpringMainModule1.java
package module1;

import org.springframework.boot.SpringApplication;
import org.springframework.boot.autoconfigure.SpringBootApplication;
import org.springframework.boot.builder.SpringApplicationBuilder;
import org.springframework.boot.web.servlet.support.SpringBootServletInitializer;
import org.springframework.context.annotation.ComponentScan;

@ComponentScan(basePackages="module1")
@SpringBootApplication
public class SpringMainModule1 extends SpringBootServletInitializer{

	@Override
    public SpringApplicationBuilder configure(SpringApplicationBuilder application) {
        return application.sources(SpringMainModule1.class);
    }

	public static void main(String[] args) {
        SpringApplication.run(SpringMainModule1.class, args);
    }
}
Step 6 – We are good now, let’s create a war file using mvn clean install. We will go till below directory and run mvn clean install.


Now go to target folder, we should have module1.war. We are good now we have module1.war. Let’s create module2.war same. Just follow the same steps as earlier discussed. Our directory structor will look as below.

Let’s do some modification in classes.
Book.java will be same only package name will differ.
package module2;

public class Book {
	int bookId;
	String bookName;
	String bookPrice;
	public int getBookId() {
		return bookId;
	}
	public void setBookId(int bookId) {
		this.bookId = bookId;
	}
	public String getBookName() {
		return bookName;
	}
	public void setBookName(String bookName) {
		this.bookName = bookName;
	}
	public String getBookPrice() {
		return bookPrice;
	}
	public void setBookPrice(String bookPrice) {
		this.bookPrice = bookPrice;
	}
}
BookController.java
package module2;

import org.springframework.stereotype.Controller;
import org.springframework.web.bind.annotation.RequestMapping;
import org.springframework.web.bind.annotation.RequestMethod;
import org.springframework.web.bind.annotation.ResponseBody;
import org.springframework.web.bind.annotation.RestController;


@RestController
public class BookController {

	@RequestMapping(value = "/book2",method = RequestMethod.GET)
	@ResponseBody
    public Book getBook() {
    	Book book = new Book();
    	book.setBookId(110);
    	book.setBookName("i am book 2");
    	book.setBookPrice("200");
    	return book;
	}

}
SpringMainModule2.java
package module2;

import org.springframework.boot.SpringApplication;
import org.springframework.boot.autoconfigure.SpringBootApplication;
import org.springframework.boot.builder.SpringApplicationBuilder;
import org.springframework.boot.web.servlet.support.SpringBootServletInitializer;
import org.springframework.context.annotation.ComponentScan;

@ComponentScan(basePackages="module2")
@SpringBootApplication
public class SpringMainModule2 extends SpringBootServletInitializer{

	@Override
    public SpringApplicationBuilder configure(SpringApplicationBuilder application) {
        return application.sources(SpringMainModule2.class);
    }

	public static void main(String[] args) {
        SpringApplication.run(SpringMainModule2.class, args);
    }
}
Let’s build this module separatly same way as we build module1.

Now we have module2.war in target folder and yes we have now module1.war and module2.war.
Let’s download jboss 7(jboss-eap-7.1.0) and extract it.

Copy both the war file and paste into the deployment folder.

Go to bin folder and run standalone.bat.


Let’s have a look into log file.

Our server is up and both module1.war and module2.war have been deployed.
In the controller we have defined some rest API, we are going to test using postman.

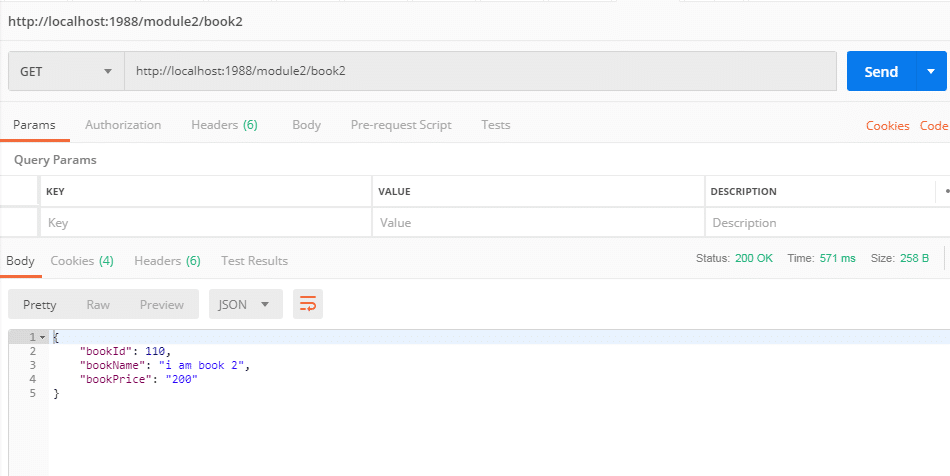
Both wars has been deployed on same port 1988 as I have changed the port in standalone.xml 8080 to 1988.
If you face any difficulties to run or any doubt leave a comment.